


Practical Tips
Going In-Depth with the Blade Bar: Sticking and Troubleshooting
The Sansnik Blade Bar delivers irritation-free shaves by lubricating your razor’s blades directly, but its magic begins with a secure mount.
Its natural clinginess keeps it in place for months, providing a flat surface for even stropping and consistent results. This guide, based on our testing and customer feedback, will walk you through how best to mount your bar…selecting a surface, mounting the bar confidently, troubleshooting any hiccups, and maintaining it for over its lifespan. Whether you’re a Blade Bar newbie or a seasoned shaver, you’ll master sticking it in no time.
Finding the Perfect Surface
A great shave begins with the right mounting spot, ensuring your Blade Bar stays secure for long lasting daily use. In your shower, look for a smooth, non-porous surface—this includes tile, glass, plastic, composite, or smooth stones such as marble or granite. These surfaces, free of rough textures, allow the bar to remain flush with the surface, ensuring a reliable mount. Avoid porous or uneven surfaces, such as wood, rough stone like slate, or tiles smaller than the Blade Bar, as these surfaces lack a smooth mounting surface. If your shower lacks any good options for mounting, you can opt to use a small handheld subway or marble tile, or even something like an old credit card or hotel room key. Select a tile that has a minimum of a 1/4-inch clearance around the perimeter of the bar.
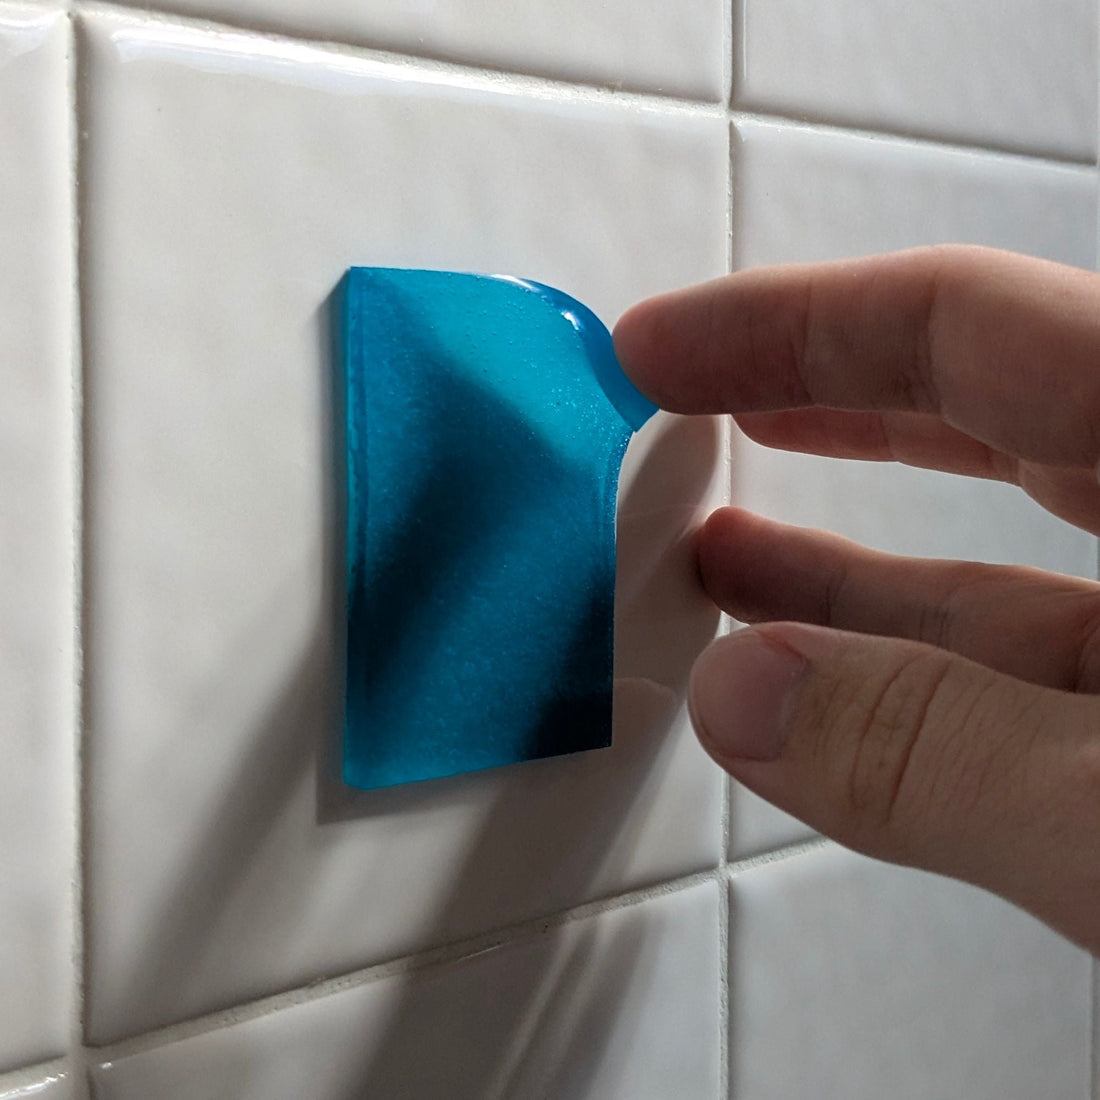
Image: Blade Bar mounted on glossy shower tile.
Mounting with Confidence
With your surface chosen, mounting the Blade Bar is simple. Start by properly preparing the bar:
-
The bar will not be sticky when it arrives and must first be washed with water for a few seconds and then allowed to fully air dry to become sticky enough to mount on your chosen surface.
-
Make sure to choose a mounting surface that is easily within reach, but not in the direct spray zone of your shower head. We want to be able to control the amount of water the bar is exposed to.
-
Wipe your chosen surface with a wetted washcloth to remove soap or dirt. If the bar accidentally becomes dirty, gently wash it and allow it to dry before attempting to mount.
-
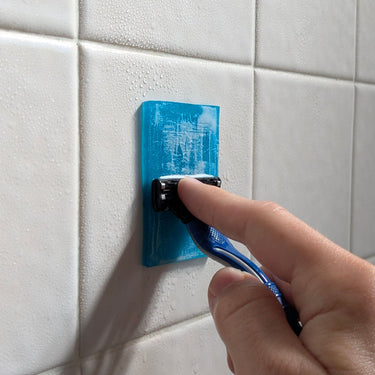
Press the bar onto the surface, starting from the center and pushing outward to eliminate air bubbles. The bar can be mounted vertically or horizontally. We recommend vertically on a wall if possible since horizontally on a surface it is more likely to be left “sitting in water,” which is not good for it.
-
Verify the bar is not on a wavy surface and that the surface of the bar itself is flat for even stropping. A stable surface is key to consistent lubrication (see Going In-Depth: Stropping Techniques).
Once mounted, your Blade Bar is ready for months of shaves. In the event the bar needs to be moved or repositioned, repeat the steps above, selecting a smooth clean surface and waiting to mount the bar until both it and the surface are completely dry.
Note* Never use the bar while holding it in your hand—holding it curves the surface, causing patchy lubrication (e.g., bare blade spots) while risking cutting yourself with your razor.
Image: User pressing Blade Bar to remove air bubbles.
Image: Graphic of usable and non-usable surfaces.
Using Your Blade Bar
Once mounted, your Blade Bar is ready for daily shaves. To use it, wet the bar by lightly splashing it. Don't soak the bar, as too much water can soften it, causing more material loss during stropping and making it more likely to slip off the surface. The bar needs a delicate balance—wet but not dripping—so your razor glides with light resistance, collecting just enough lubricant as you strop. In contrast, drench your skin and razor (before stropping) with water to maximize the glide during shaving. For more information on how to use the Blade Bar or how to strop the bar, check out these articles:
-
Link To Getting Started With The Blade Bar
-
Link To How To Strop
Handling Common Issues
If you are experiencing issues with mounting the bar or keeping it put, we’re here to help. As mentioned earlier, if the Blade Bar becomes water-logged, the bar will swell, causing the bar to eventually fall off its surface. To avoid this, don’t use too much water, avoid spraying water directly at the bar, and don’t attempt to mount it to a wet surface or when it is wet. If water becomes an issue, gently remove the bar, dry both it and the surface thoroughly, and remount it. Soap or dirt on the surface can also inhibit the bar’s ability to cling. A quick wipe with a wetted washcloth restores the surface, allowing the dry bar to stick firmly. If the bar becomes dirty, wash it in the shower or at the sink and pat dry.
As the bar ages, it may show signs of warping or damage which may prevent the bar from mounting reliably. Delamination and drying out can both begin if the bar exceeds 14 weeks of use. If, for any reason, warping begins early, lift the bar and place it on a horizontal surface for up to 24 hours. If the warping appears severe, flip the bar before placing it on a horizontal surface to stretch the bar in the opposite way it’s mounted. For any persistent issues, reach out to support@sansnik.com for personalized guidance.
Maintaining Your Blade Bar
Keeping your Blade Bar in top shape ensures it lasts up to 14 weeks or 30 shaves, whichever comes first. Make sure the bar remains dry between uses, letting it air out. Check weekly for dirt or water buildup, wiping with a damp washcloth if needed (especially if it is positioned horizontally). Replace it when significant stropping grooves appear on its surface or if the bar becomes severely warped or distorted. When traveling, dry the bar completely and store it flat to preserve its shape and clinginess. Stay tuned for when we release our Blade Bar travel case.
Stick your Blade Bar with confidence and explore more at Sansnik’s website.
Keywords: Blade Bar, sticking Blade Bar, troubleshooting, eco-friendly shaving, shower shaving


